Big Bend Night Sky Workshop
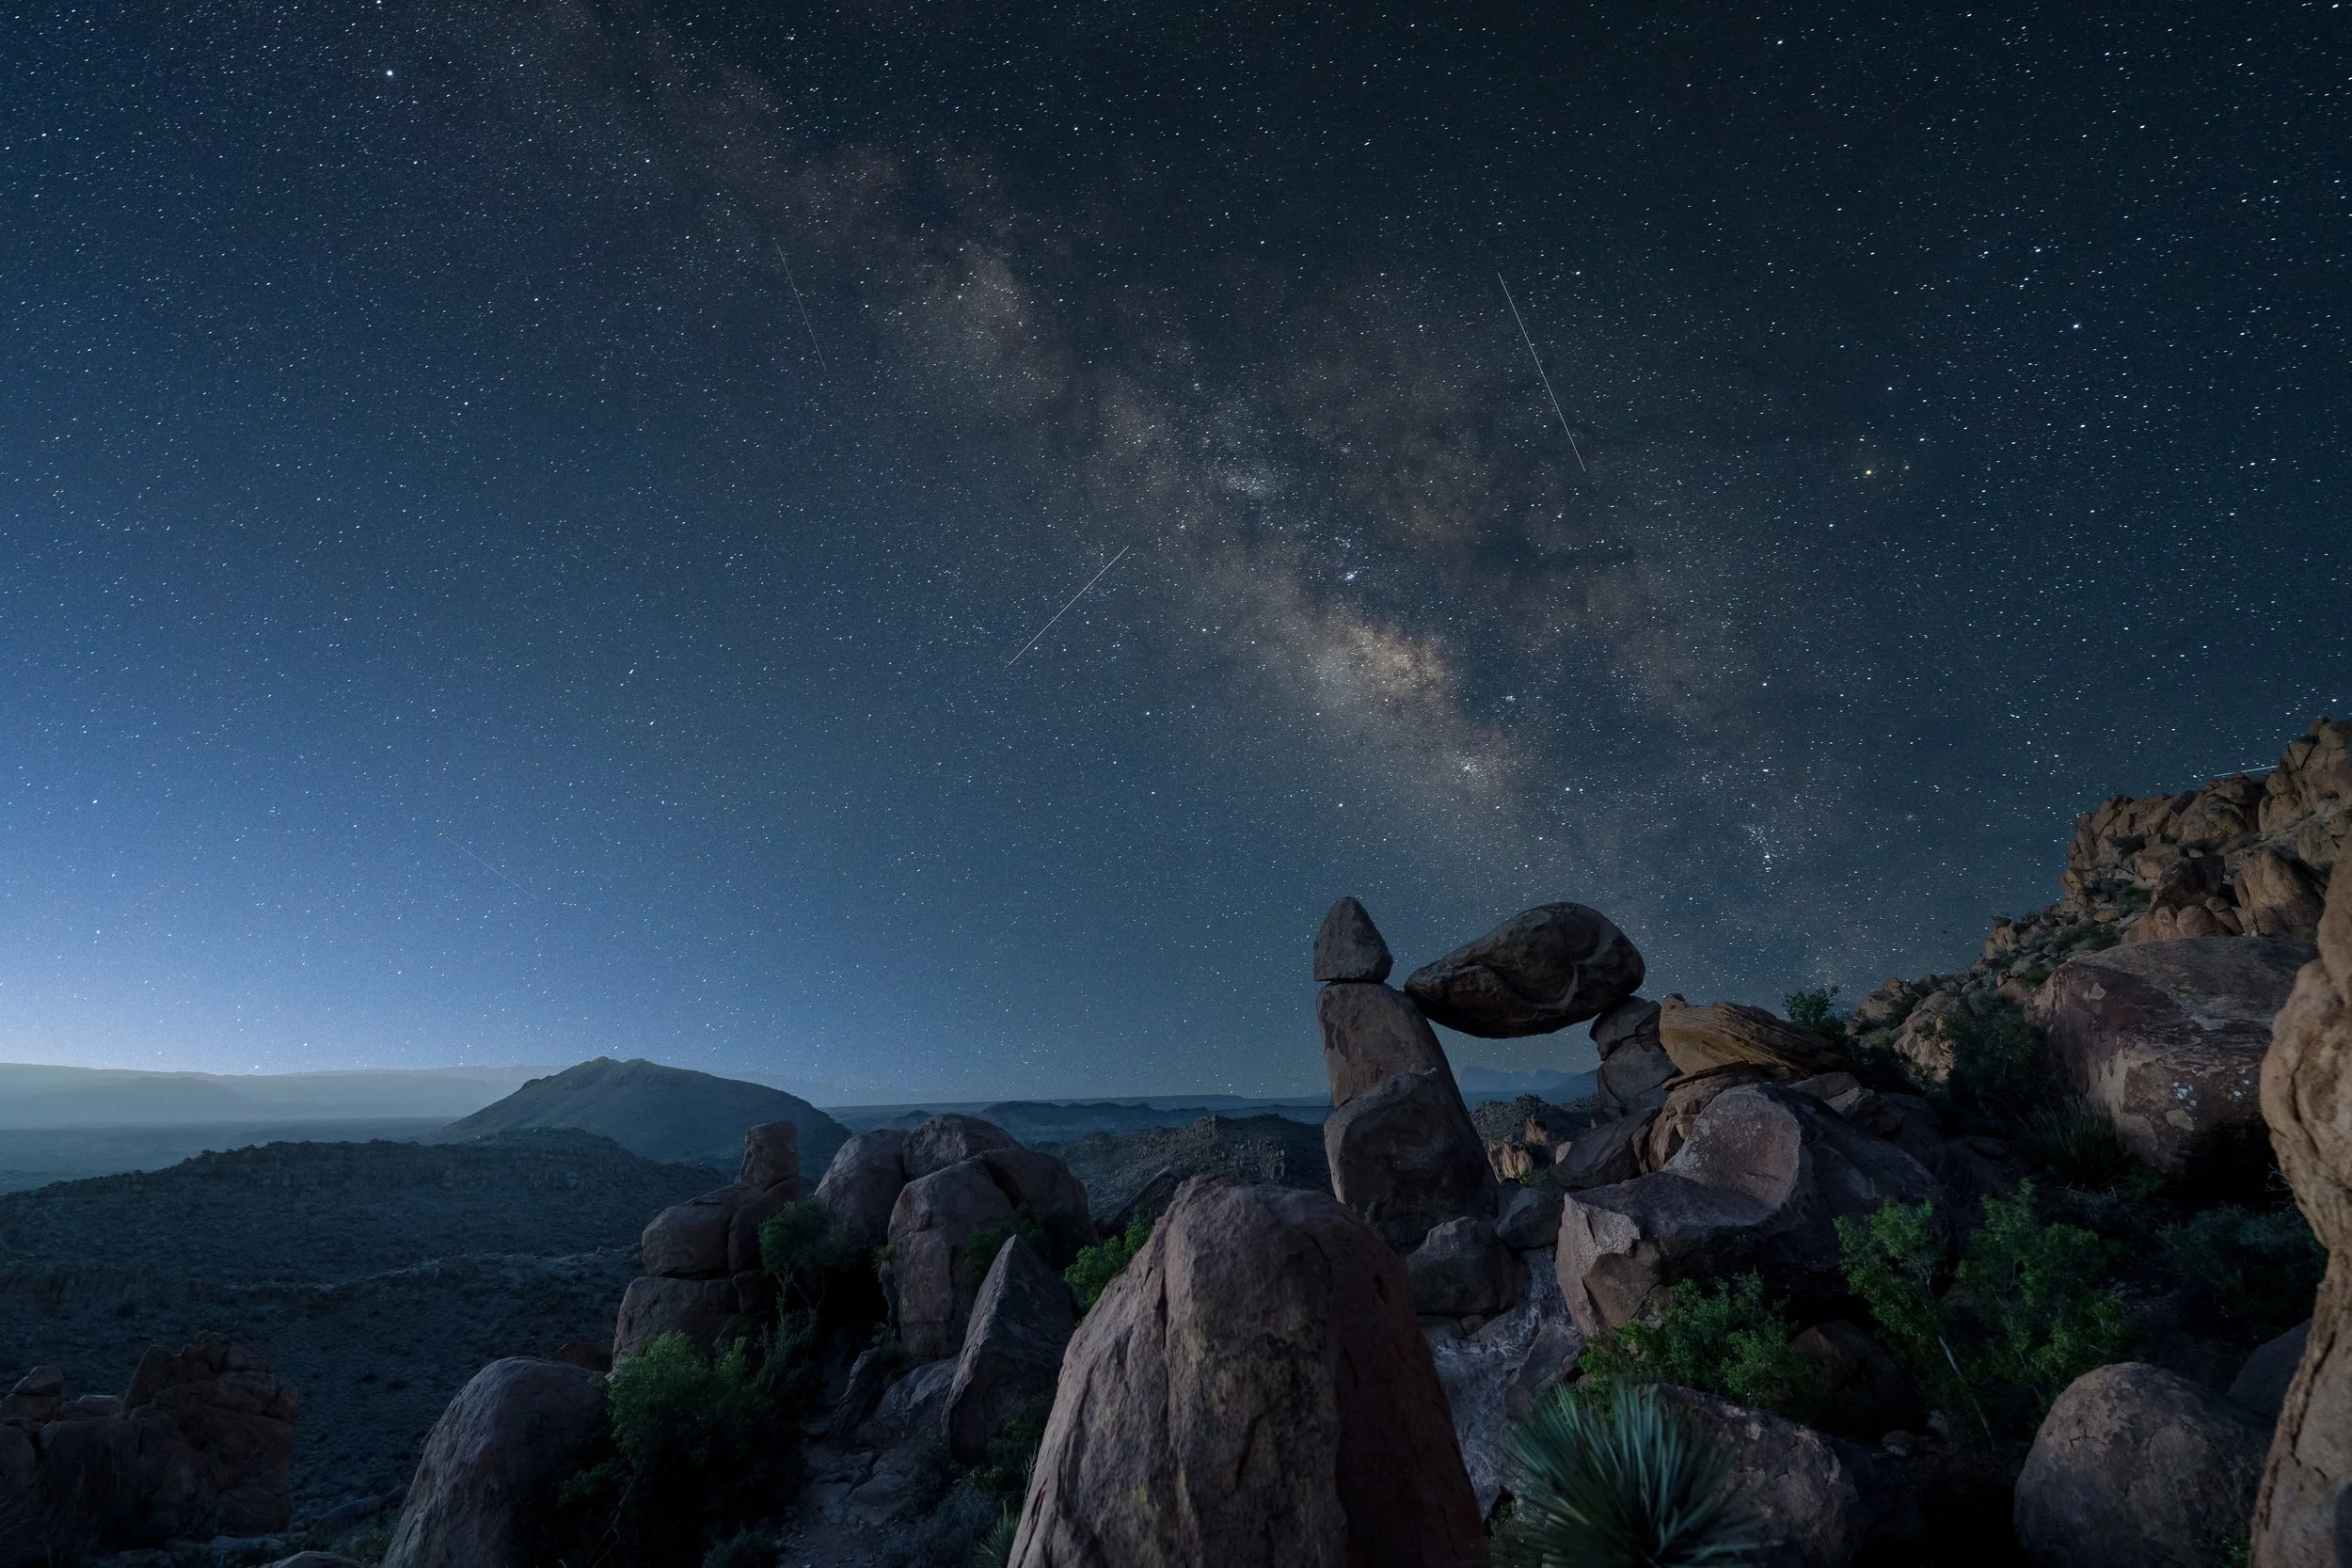
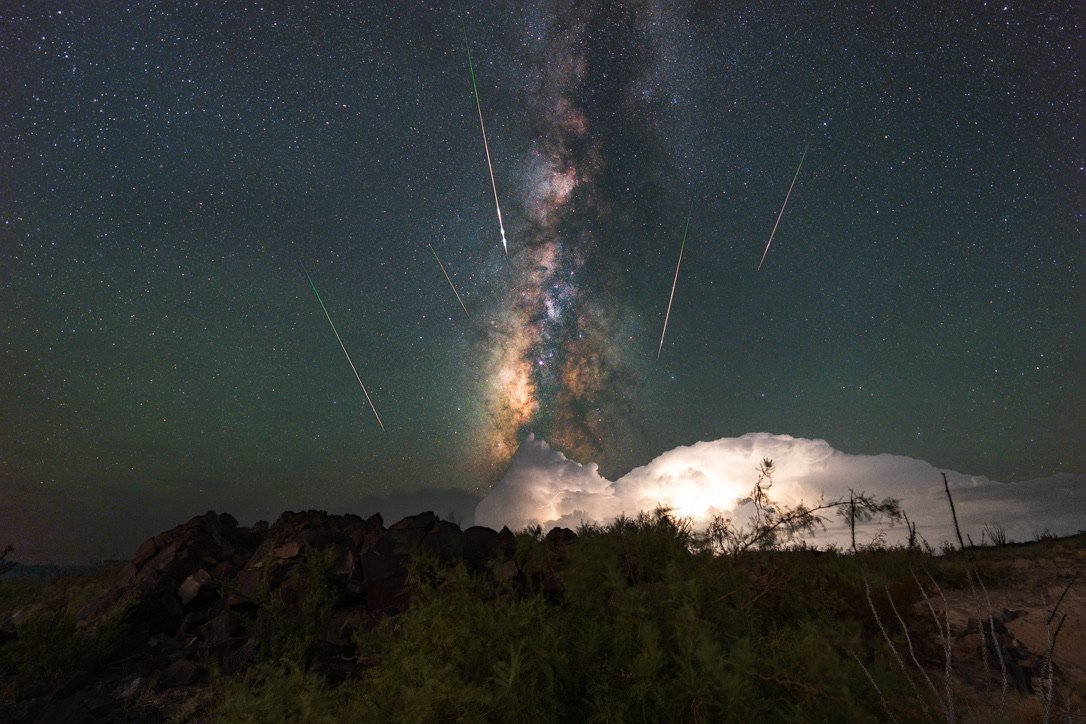
Big Bend is one of the top places to capture the night sky. Our photography workshop will show you why DarkSky International named the region one of the best places in lower 48 for stargazing and astrophotography. I’ve been a photographing the region for 10+ years and know the the best times to visit the park, best locations, and all the little things that will help you create great photos while in Big Bend National Park and the West Texas.
Our workshop is perfect whether you’re a new photographer to astrophotography or a pro who want to learn how to capture the beauty of the night sky. You will learn how to scout for the perfect location for photos, learn the proper settings on your camera to take great night sky pictures, and edit your long exposure photos of the night sky and the surrounding landscape together in Lightroom and Photoshop.
Big Bend National Park has been a big part of my photography journey over the last decade. Whether you're a beginner or an advanced photographer, this workshop will provide you with the knowledge and skills necessary to take your night sky photography to the next level.
The workshop will be limited to 10 seats to ensure the most personal and as much 1-on-1 as possible during the shooting and editing sessions.
Introductions
My name is Ben Sassani and I’ve been traveling to and photographing the night sky in Big Bend for 13+ years. I will be teaching this workshop with my friend Mallory Davis who also has extensive knowledge of photographing the area.
Together we have over 40 trips to the region in the last decade between the both of us.
We’re putting all our knowledge and experience from our trips into this workshop to teach you what took us a decade to learn. We hope you join us and learn to love the area as much as we have on our ventures.


What You’ll Learn
Scouting for the best locations in Big Bend and west Texas
An understanding of how to take full advantage of your camera to capture the night sky
Learn about milky way season and how to plan for your trip
How to use apps to help plan for the best shots
How to use lighting to make your picture pop
Post Processing
How to download and organize your photos
Learning the basics of editing in Lightroom
Stacking, Orton effect, and other editing techniques in Photoshop
What You’ll Need
Camera with high ISO capability
Wide angle lens (24mm or wider) with f/2.8 aperture minimum
A sturdy tripod
Flashlight and/or Headlamp with red light option
Laptop with access to Lightroom and/or Photoshop
Extra camera batteries
Big Bend night sky workshop, March 14-17, 2026
Big Bend night sky workshop - September 9-13, 2026
The fees for our workshop only covers the workshop itself. You will be responsible for all other fees associated with your stay. These include lodging, food, park entrance , and any other unforeseen fees that might come up.
Physical Requirements
Big Bend and the surrounding region are in remote regions and in the middle of the Chihuahuan desert. Here’s a list of physical requirements you will need to have in order to attend this workshop.
Although most of the locations we will be going to do not require much hiking you must have the ability to hike one to two miles per day over uneven, hilly, and at times rough terrain.
Ability to shoot in a variety of weather and environmental conditions from bright sun to summer storms and at elevations ranging from 1,800ft to over 7,500ft in elevation, depending on the workshop.
The ability to remain flexible to make the most out of the often changing environmental conditions.
The ability to work well with others in a group setting.
We will be in areas where the potential hazards such as local wildlife, unstable terrain, and short cliffs are great possibility. We ask everyone to stay in a group and not wander off without letting us know.
Workshop Timeline
march 2026 workshop
If you’re attending the March workshop plan on arriving sometime on March 13th. During the early part of the year the milky way is visible after midnight into the early morning, so we will be shooting overnight up until the sun rises. The final schedule will be sent out via email to all participants, but here is what you can expect
March 13
We will start this workshop with a meet and greet of all participants at 6:30pm. This gives us a chance to meet everyone and chat before we officially begin the next morning.
March 14
We start the lesson portion of the workshop mid afternoon which will take most of the afternoon and into the early evening. We will have a break after shooting the sunset and regroup in the early morning to shoot the milky way until sunrise.
march 15
On the 2nd day of the workshop we discuss how to post process the images we took the night before. We will spend time talking about different editing tools, programs, and what to look for while editing your photos. We will take a break after sunset and gather again at our overnight location to put everything we’ve learned from the previous 2 days together for a shoot until sunrise.
march 16
Our last full day together we will be diving into more detailed editing techniques and helping you understand how to put everything you’ve learned together. Our final day will be an opportunity for everyone think creatively and put all the information you’ve learned in 3 days together to create your best photos.
March 17
Early afternoon session to discuss any final questions or thoughts together before departing.
September 2026 Workshop
Since the milky way will be up after sunset, if you’re attending this workshop plan on arriving early afternoon on March 13th. The final schedule will be sent out via email to all participants, but here is what you can expect
September 9
We will start this workshop with a meet and greet of all participants at 6:30pm. This gives us a chance to meet everyone and chat before we officially begin the next morning.
September 10
We start the lesson portion of the workshop mid afternoon which will take most of the afternoon and into the early evening. We will head to our first location around sunset to shoot the milky way until sometime after midnight.
september 11
On the 2nd day of the workshop we discuss how to post process the images we took the night before. We will spend time talking about different editing tools, programs, and what to look for while editing your photos. We will head to our 2nd location around sunset to put everything we’ve learned from the previous 2 days together for a shoot.
September 12
Our last full day together we will be diving into more detailed editing techniques and helping you understand how to put everything you’ve learned together. Our final day will be an opportunity for everyone think creatively and put all the information you’ve learned in 3 days together to create your best photos.
September 13
Optional breakfast to discuss any final questions or thoughts together before departing.
Where to Stay
Big Bend National Park and the surrounding area are pretty remote and finding the right place to stay can be challenging depending on the time of the year you travel to the region. Over the last decade the area has become popular, and although there are options of where to stay, rooms book relatively quickly so be sure to plan your with intention for the best experience. I’ve been traveling to the region for 11+ years and have stayed at quite a few places during my trips. For me I look for the best place for as small of a budget as possible since I’ll be spending most of my time exploring the park and taking pictures. The most important things are cleanliness, a comfortable bed, and quick access to the park.
There is also plenty of options for camping in the area and the best place to look for a spot is recreation.gov. Please keep in mind if you’re attending the workshop you’ll be sleeping during the hottest parts of the day. Although spring and fall time aren’t too hot outside in the evening and overnight, any given day the temps can get hot enough to make it a little uncomfortable. So if you choose this option for your stay, please be advised in advance.
Here are a few recommendations of where to stay
Big Bend Station - This location has been my go-to for most of my trips over the last 12 years than any other place. It’s conveniently located next the only gas station in the Terlingua area and very close to the entrance of the park. They are also one of the biggest spots in the area with the most amount of rooms available. Whether you’re you need a single bed, double, staying with the whole family, or just a place to park your RV or trailer, they have a spot for you.
Recently there’s been a management change and big renovations have been done to the entire place. The new rooms look great and pricing is still reasonable and affordable for the area.
Chisos Mining Co. Motel - Locally owned and operated, this spot is between Big Bend Station and Terlingua. The rooms are simple, clean, and it’s located a few minutes from the entrance of the park and close to Terlingua. If a parking spot and a clean bed at a good price is what you require, this is your spot.
This would be the optimal place since they’re affordable and centrally located.
Basecamp Terlingua - With the most variety of places to stay, this is the most trendy option in the Terlingua Study Butte area. Everything from casitas, tipis, to the infamous bubbles you’ve probably seen on social media there is plenty to choose from. Pricier than most options and normally booked pretty far in advance, this is where you stay to have an experience in Terlingua.
Chisos Mountain Lodge - This is the the only lodging option inside the park. It’s located inside the basin which puts it a good 30-40 minutes away from the west entrance of the park and Terlingua/Study Butte. I’ve never stayed in the basin because (to me) this is a little more out of the way for the places I go to photograph in and around the park. This location will also be 30+ minutes from where I’ll be doing the workshop, so it won’t be the ideal place to stay.
The Summit - The best glamping spot in the region and home of the cave hotel rooms you’ve seen all over social meida. A little more pricey than other options and location is further out closer to lajitas, but if you want a beautiful location to stay at, this one is it. Please beware the road to their bubbles is a little rougher than most other places, so a higher clearance vehicle is suggested, but not required.
Airbnb - There’s plenty of airbnb options for all budgets in and around Terlingua and Study Butte. I’ve stayed at a few of them, and as great as they are, they also need to be booked far in advance. Most are situated in and around Terlingua and have close access to the park and where we’ll be holding the workshop.
What Equipment to Bring for the Big Bend Night Sky Workshop
As an attendee of there are a few prerequisites and basic knowledge of photography you need to have. Below are the guidelines and suggestions of everything you’ll need to attend the workshop.
Camera(s):
Your camera should have a manual mode and you should be somewhat familiar with how to use these settings. This will be key for focusing in pitch black situations and the high ISO capability will allow your camera to take a picture of the night sky with as little noise as possible for best results. Remember, there’s little to no light to focus on in the night sky so we’re doing all of it by manually adjusting our camera and lenses.
Most mirrorless cameras on the market now can capture night sky photos without issue so if you own one you’re most of the way there. Even older full frame DSLR cameras dating back 10+ years are still capable of taking night sky photos if paired with the right lenses. Although most hobbyist DSLR cameras are capable of high ISO settings I’ve learned the lens options for those cameras are minimal and it won’t give you the best results. If you feel your camera or lens is not capable of high ISO photography one option you might consider is renting a newer camera and lenses for the workshop. There are plenty of places to rent gear from, but the one place I’ve used and trust is lensrentals.com. They have all the latest and greatest cameras and lenses plus tripods and all other gear you’d need for this workshop.
I started my journey into night sky photography shooting with a Nikon D700 and Nikkor 14-24 f/2.8 lens back in 2013. I was still shooting with Nikon cameras (D810 and D4s at the time) until 2021 I fully switched to Sony mirrorless cameras. I’m currently shooting with a Sony A7IV and A7RIV with a variety of lenses, but my 2 main lenses for night sky photography are the Sony 16-35 f/2.8G and Sony 14mm f/1.8G.
Lenses:
For night photography your lens makes the biggest difference in the outcome of the final photo. For night sky beginners a wide angle lens with focal length of 24mm or wider and aperture of f/2.8 is the ideal. To capture more of the night sky you’d ideally like to have a 20mm or wider lens, but it’s not a must. Having the widest aperture allows the most amount of light to hit the sensor. Combined with a newer camera it also allows you to use the lowest possible ISO setting to capture the image you’re looking for.
If you don’t have a lens or want to try a lens you’ve been wanting to try another lens, again, lensrentals.com is your best friend.
Tripod:
For night sky photography a good tripod is key. All of the pictures we will be taking require a tripod but doesn’t mean they have to be expensive. There are plenty of great options out there and as long as your tripod has a load capacity more than the weight of your camera and lens combined, you’re good to go.
Some reputable brands to consider are Manfrotto, Gitzo, Benro, and Peak Design. I personally own the carbon fiber version of the Peak Design Travel Tripod and have been using it for years. It’s the perfect size for me and it can hold all my camera gear and lenses I’ve thrown on there so far.
One word of advice when purchasing a tripod, not all tripods come with a ball head attached for your camera to mount to. If you’re buying a new one please make sure you either buy a ball head attachment or make sure it already comes with one. Without it you’ll have just the legs of a tripod which will be useless for night photography.
Filters:
Although there’s night sky filters on the market I’ve never used them. The night sky filters I’m familiar with are used for cutting out light pollution while still keeping the details of the milky way in your photos. Since Big Bend is one of the best and darkest spots in the lower 48 and part of the dark sky preserve, I don’t feel these filters are necessary. If you’d like to use them in places where the sky isn’t as dark and there’s more light pollution, B&H has plenty of options you can find here.
Memory Cards:
Bring extra memory cards with you. We will be taking a ton of photos and you’ll need more than a few backup ones through the night. I’d suggest having cards with capacity between 64GB and 128GB for maximum usage.
Batteries:
Bring a few extra batteries. Doing long exposure photography will drain the batteries in your camera faster so having backups is a must.
Intervalometer:
Most new cameras have intervalometers built in. If you’re not familiar with how to use them I’d suggest bringing your camera manual or watching a few YouTube videos to familiarize yourself with the basic functions. I can help with the Sony shooters, but I’m not familiar with Nikon or Canon so I won’t be much help in that aspect during the workshop.
If you’d like an external option there are plenty of affordable options on both Amazon and B&H. A good inexpensive one should run you between $20 to $50.
What to edit on:
A laptop with a charging cord is a must. We will be editing our photos on the latest version of Lightroom and Photoshop so having those installed and updated before arriving is key. If you don’t have these programs and would like to get them, Adobe has a LR & PS bundle available for $10/mo that will give you access with a free trial.
Other programs I suggest are:
StarStax - This program is used for star trail photos. It’s a simple and free.
LRTimelapse - This program is used for time lapse photos. It does have a bit of a learning curve but can be very useful. We will be discussing them during the workshop but it’s not necessary to have it since we’ll be concentrating on learning the basics of taking photos.
Starry Landscape Stacker - This program is a very simple program as the name suggests. Since we use high ISO to shoot night sky photos, this program is used to stack multiple photos to reduce the noise you might have in your pictures. Although it’s not necessary to have, both Mallory and I both use this program and will be discussing it during the class.
Please note: if you’re using capture one, Mallory and i are not PROFICIENT using and editing on it, so you’ll have to know the program well enough to be able to translate and edit as the class progresses.
Apps:
PhotoPills - This app is the gold standard for planning your shot, learning your settings, and even using the AR mode to visualize the shot you’re looking for. I would suggest downloading this app since we will be talking about and using it extensively.
This app does cost $10.99
NPS - (National Park Services) - This app is strictly for National Parks. It allows you to download individual parks for offline use and will show you any information you’d like to know regarding the park you’re in. Although it’s not a photography related app I still consider it to be a vital part of my visit to any national park.
I also highly suggest learning how to download maps for offline use on Google Maps and Apple Maps on your phone. There will be little to no cell signal when you’re in the park so having a useful map will be a vital part of knowing where you are and where you need to go. The links below will help guide you on how to do both
Getting to Big Bend
Driving
There are a few routes to get into the Big Bend region. While there’s always the shortest route through the major highways, there’s also options for a more scenic route. Here’s how to get to the park from each corner of Texas (and beyond)
Driving in from the east: Interstate 10 is always going to be the fastest route to the part coming in from Houston, San Antonio, or Austin. If you’re choosing this route take the US-67 exit going to Alpine from I-10 heading south. Once you arrive in Alpine, take TX-118 south to Teligua and Big Bend.
Driving in from the east (scenic route): Coming from Houston, San Antonio, and even Austin, there’s an alternate route. While it’s a little longer it’s definitely more scenic and more options for stops along the way. This route takes you from HWY-90 out of San Antonio through Del Rio, Sanderson, Marathon, and ultimately Alpine. If you choose this route there’s two options on how to get to Big Bend and Terlinqua. First option is taking US-385 south from Marathon which will lead you into Big Bend National Park from the north entrance. Once you reach Panther Junction and the visitor center, take a right going west bound on Panther Junction Rd. out of the west entrance of the park and into the Study Butte/Terlingua area.
This route takes you over the tallest bridge in Texas over the Pecos river in the town of Comstock. It also goes through a few small historic towns like Sanderson.
Driving in from the west: If you’re coming from El Paso and New Mexico area once you arrive in the city of Van Horn, take US-90 south heading toward Marfa and Alpine. Once in Alpine, take TX-118 south into Terlingua and Big Bend.
You also have a slightly longer and more scenic route from Marfa, if you choose. Once in Marfa, take US-67 south to Presidio, then take FM170 (River Road) from Persidio through Big Bend Ranch State Park and Lajitas into Terlinqua. The drive through the state park is one of the most beautiful drives in all of Texas. So, if you have the time and want to see some beautiful scenery this is the drive for you.
Driving in from the north: If you’re coming in from Dallas or Midland/Odessa, Highway 20 into Mohanans, TX then taking FM1776 south past I-10 (which turns into US-67) and into Alpine. Once in Alpine you can take TX-118 down into the Big Bend and Terlingua area.
Flying
If you’re flying in from the workshop there are two airport options:
Closest airport to the park is Midland Airport (MAF). Once there you can follow the driving directions above coming in from the north to get to the Big Bend Region. The drive from this airport to Big Bend is around 3 1/2 hours one way.
Your other option is flying into El Paso International Airport (ELP). Being a bigger airport there will be more flight options. Once there you can follow the driving directions above coming in from the west to get to the Big Bend Region. The drive from this airport to the park is almost 6 hours one way.
Where to Eat
Big Bend and Terlingua is a very small region, so as you’d imagine, food options are limited. I’ve put together some of the best spots to eat in the area while visiting for the workshop.
Starlight Theater: By far the most popular restaurant in Terlingua. They have a full menu and a full bar available from 5PM to midnight 7 days a week. This is a great spot to go watch a live band, enjoy the patio with other patrons, or shop for souvenirs at the general store next door.
DB’s Rustic Iron BBQ: DB’s is the only Texas style BBQ spot in the Big Bend area. Open 11AM to 9PM Wednesday to Sunday they’re another option for great food and live music in the area. If you’d like to know more about them, read the Texas Monthly article written about their new location.
Long Draw Pizza: The only pizza spot in the region, they have great food options and a ton of TVs for you to watch sports on. Closed on Tuesdays and varying hours for other weekdays and weekends makes them another great option for food in Terlingua.
Taqueria El Milagro: Another great option for dinner. They offer a variety great food and drinks in a patio setting.
Espresso y Poco Mas: a sister restaurant to Taqueria El Milagro, they offer a variety of coffee and breakfast burritos.
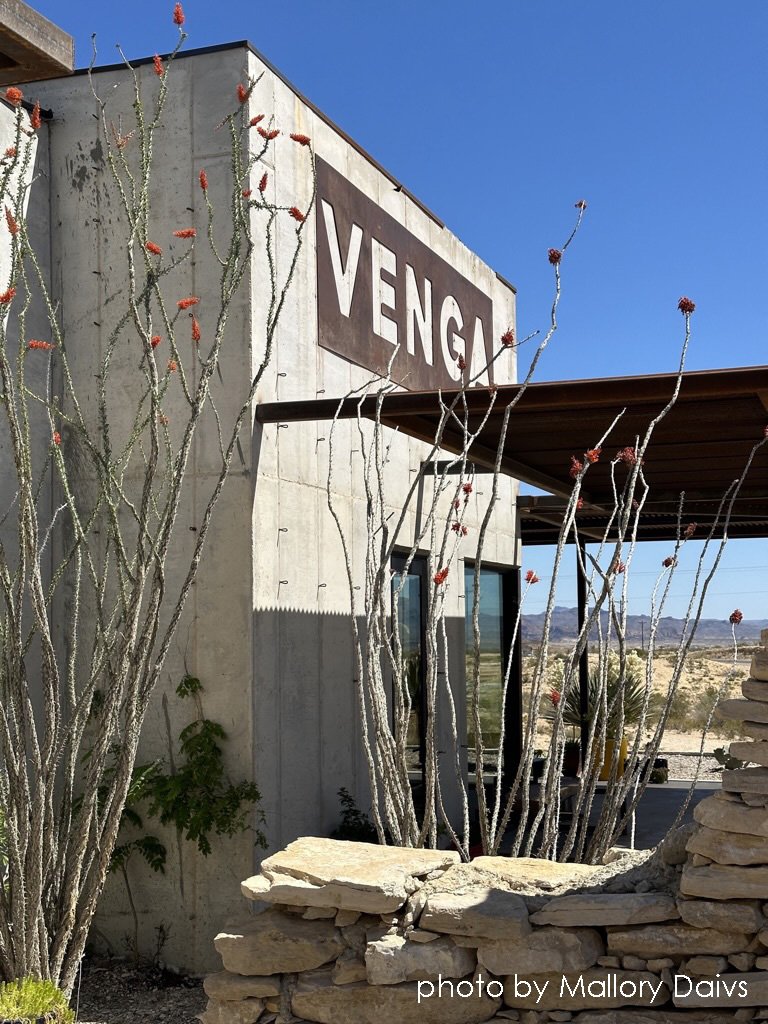
Venga Cafe: Quickly becoming the first option for breakfast and lunch for the region, it’s the newest and nicest spot you’ll find to lounge and enjoy your food during the day.